Drawing in 3D
This fall, the Dover Public Library will be starting a new service for local schools and groups, a Mobile STEAM Lab. The traveling lab features some awesome gadgets and toys to help teach science, technology, engineering, art, and math. We have Snap Circuits, KEVA Planks, an Ozobot robot, and two 3D Printing Pens.
The 3D Printing Pens the Library has in the Mobile STEAM Lab are PACKGOUT 3D Doodler Drawing Printing Pens and currently run $30 on Amazon. About two years ago, I spent $100 on my first 3D Printing Pen. About five minutes later, I think I broke it… It got clogged every five minutes and was the most frustrating thing I’ve ever bought. With these new pens, I saw a second chance, and if these ones clogged, well, at least they would have been a lot cheaper. But something amazing happened. They actually worked like they were supposed to! No jams. No frustration.
It didn’t take me long before I decided I had to get myself one of those pens. So, I did, and once I started drawing, I kind of didn’t stop. I’m a little embarrassed by the amount of time I’ve spent playing with my new toy and by how much material I’ve burned through in such a short amount of time. Then again, I’ve made some really cool things and learned a lot about how to use the pen.
Generally, 3D Printing Pens work kind of like hot glue guns in that you have material that you feed through the device that gets melted and extrudes out the other end. Having a long history with glue guns, this explanation makes sense to me. Instead of glue, 3D Printing Pens use plastic filament like this.
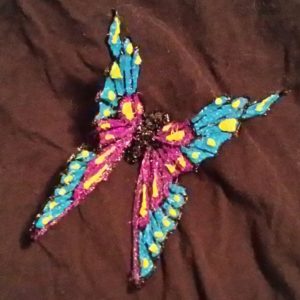 Project #1: 3D Butterfly
When 3D Doodling, you usually have a stencil that you trace. One of the most common stencils is a butterfly. It’s drawn in three pieces: 2 wings, and 1 body. You always start with an outline; with this project, in black, and then fill in.
To change colors, you simply eject the first color then load the next color. You want to doodle a bit out between color changes, as remnants of the old color will remain as you get started on the new one.
When all the pieces are done, you gently pry them off of the tracing surface and “glue” them together with more melted filament. I changed back to black for this task.
The whole project probably took me half an hour to forty-five minutes. On my old pen, this same project took me a week because I had to keep putting it down.
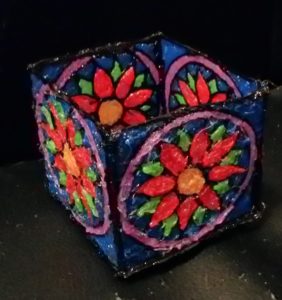
Project #2: Stained Glass Inspired Box
To make this box, I found a free coloring page online that looked a little bit like a rose window. I shrunk it down and printed it off as my stencil.
With any box, first you draw the sides and the bottom, then you put them together.
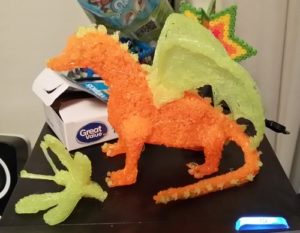
The possibilities with a 3D Printing Pen are endless. Don’t believe me? Say it again to my… DRAGON!
-Liz Strauss, Teen Librarian